


I found this quilt pattern via internet search on this blog, City Stitches. It is a pattern by Megan Nicols of City Stitches and offered by Aria Lane and available for purchase at Pile of Fabric and at Mad About Patchwork. I read through all of Megan's quilt along posts and decided I was up for a new challenge: Circles.
I was searching for something unique. Non-traditional. Bold primary colors. My daughter said this was the quilt for her. The bright colors and the bold shapes completed the vision she had for her nursery. My daughter grew up in the Northern Hemisphere and my son in law grew up in the Southern Hemisphere. The quilt already has special meaning to their family history.

Attention: You can stop now if you don't want to continue reading my sewing story.
I know my posts get a little lengthy with pictures and story.
Keep reading to see how I made this Hemispheres Quilt.
I love this part of quilt making.
The vision, the shopping, the research and all the preparation before the first cut.
- I had a limited selection of solid colored fabrics. So I had to grow my collection fast.
- I loaded up a shopping cart and headed to the cutting counter.
- I purchased a nice colorful rainbow stack of 1/4 yard cuts of Kona cottons.


I did prewash all of these fabrics. I have had a bad experience with color bleeding on deep maroon, red and dark navy blue. I just thought it best for a quilt that would be washed often. I cut a snippet of each color and sewed it on a strip of Kona White. There was some suspect color bleeding so those were eliminated from the "rainbow".
I have never made any proper circular blocks, so I researched the cutting tools available. I bought this circular ruler and required cutter. You must buy them both because only this cutter will work on this particular ruler. It has a really narrow blade to manipulate the curves. Now that I have finished, there may be better options out there, but this one certainly got the job done.


***I have a confession to make. I did not follow the pattern maker's directions.***
I cut out my half circles using the 7 inch marking on the ruler and sewed right sides together to fusible webbing. Then I turned the half circles right side out, cut close to the seam allowance, and ironed the half circle on to the white background fabric.


Then I topstitched the half circle to the background. It wasn't that I couldn't have taken the time to cut the circle pies and the background crusts....Ain't nobody got time for that! I took the shortcut I learned from Eleanor Burns and went with it. There is extra bulk but not enough to matter...to me anyway!

SPIRAL QUILTING!
My first attempt.
I layered quilt top, batting (Soft and White by The Warm Company) and backing...and pinned every three inches as instructed. I didn't use a walking foot as recommended. Mainly because the quilt guide I needed would not fit on my walking foot. I needed the quilt guide to mark the spacing between lines of stitching.

Round and round I went. It is really not that bad. Honest!

I did tie and knot all the threads. Then I hid all of the thread tails pulling them with the threaded needle into the layers. Very time consuming but it must be done. Don't want to risk threads unraveling with the washing and drying in years to come.

I did encounter a few bumps along the way. There were some pleats and puckers. The entire backing shifted with the spiral sewing. I was left with some triangle edges showing. So I sewed some extra backing fabric over the spaces and no one but me will ever know about that.

My sewing stitches are not always smooth. Always make sure the needle is down before lifting your pressure foot. The stopping and starting will make little jags like this:

And I still haven't mastered pin basting, no matter how many pins I put in. Watch out for shifting,especially while spiral quilting like this:


Will I ever make another circular quilt? Will I ever spiral quilt again?
Yeah Buddy! I have a few projects whirling around in my head for sure!
The quilt is wonderful. We all love how it turned out.

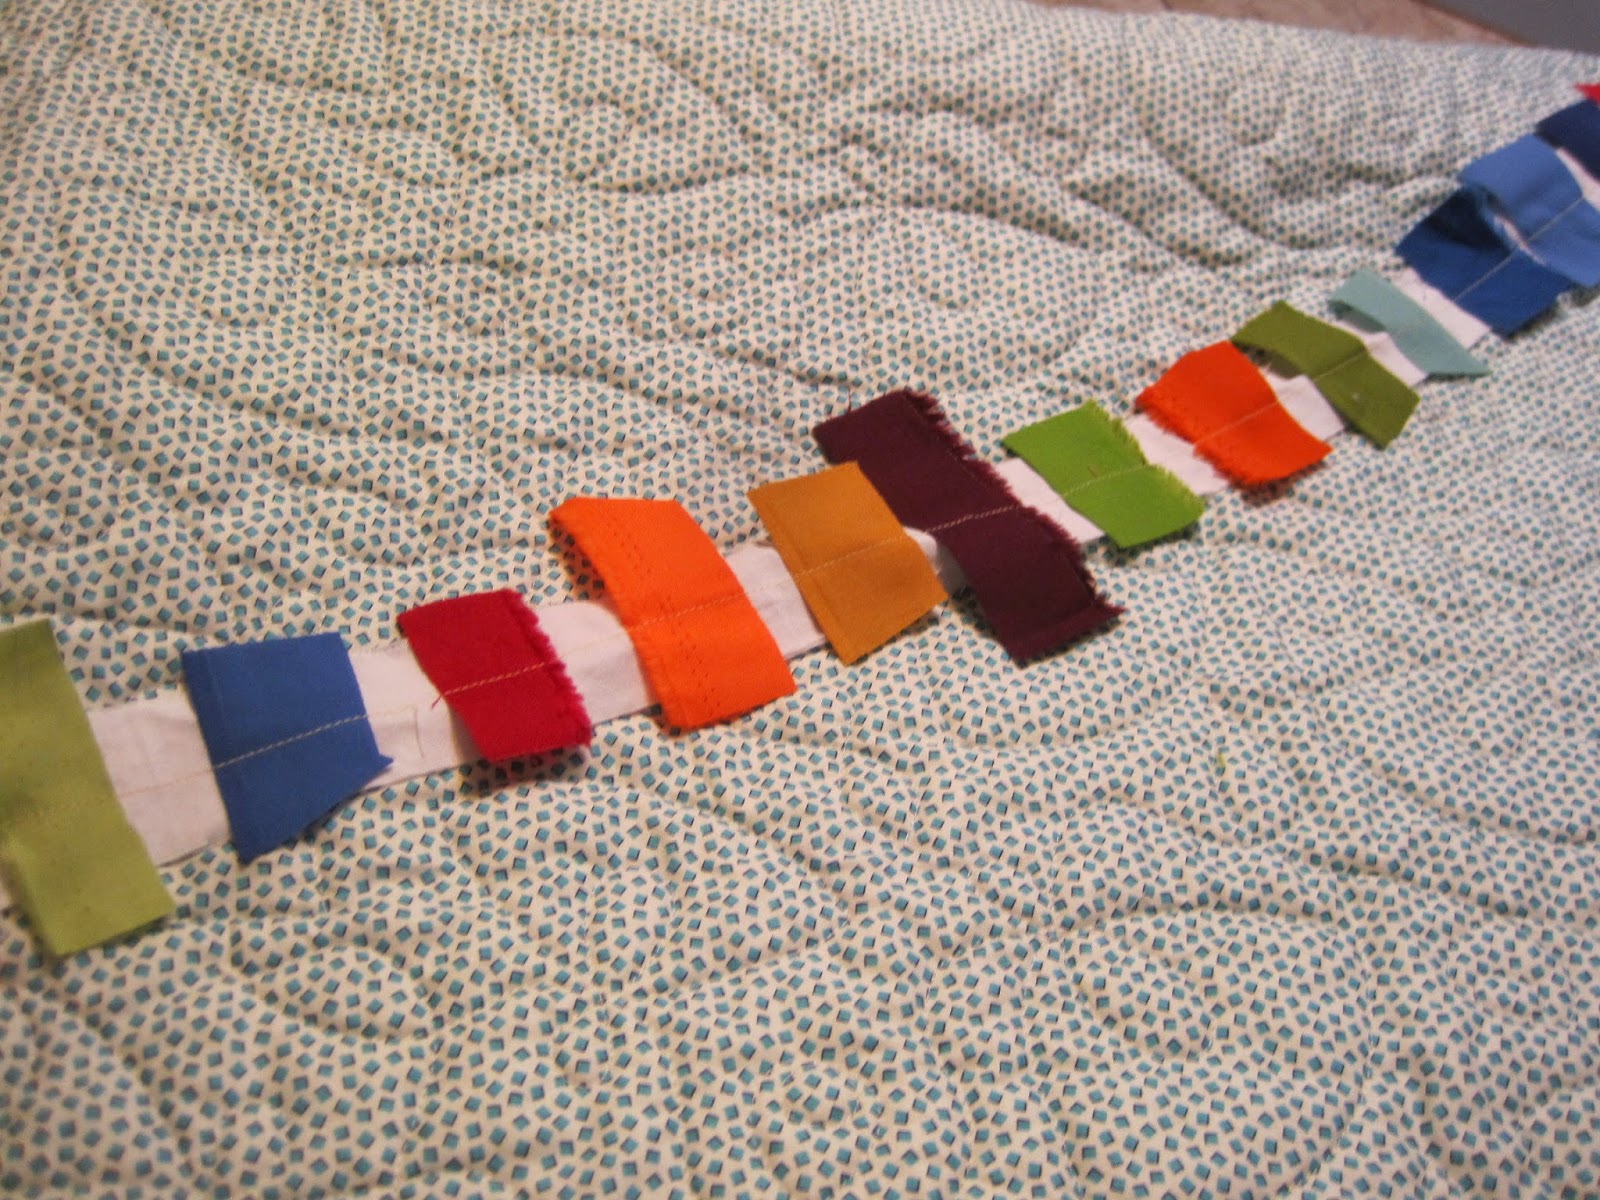
It is finished off with a matching multi-colored stripe binding. The backing is blue with multi-colored dots.
None of my blips stand out. Isn't it great?
Thanks for stopping by for today's quilt story.
This is gorgeous! good for you for trying something new and challenging. This will be on my to make soon list. Visiting from Quilt Story, thank you so much for sharing!
ReplyDeleteThank you! Hope you find some time to make this one.
DeleteI love all the back stories. Helps me understand the work that went into it. And you are a genius. I never realized. Science and art mixed into one.
ReplyDeleteNot a genius. Just addicted to fabric and making quilts. Thanks!
ReplyDeleteLovely name and lovely quilt. It is certainly very "Modern" as they say.
ReplyDelete