Monday, November 24, 2014

Monday Makings - Flannel Raggedy Edge Quilts

Last week I made a few raggedy edge flannel quilts.  I call mine raggedy edge flannel quilts because I am not so fond of the more widely popular name "rag quilts."  If you haven't made one, you should.  They are fun, fast, soft and warm. And best of all, once you've finished sewing, you are done!  I love flannel fabric. I live in my flannel shirts layered over other shirts in the winter months.  I am a fan of flannel pajamas and my kids use flannel sheets.  These quilts make a great baby quilt/gift too.  I made my edges about a 7/8 width seam allowance so the edges are extra fluffy. I stitch several lines through the center to keep everything from shifting.  I used this giant 10 inch tumbler tool.  The cute fabric prints are allowed to peek out in a big way among the fluffy edges. And sometimes, I like to frame the quilts with borders.  Every one I make is just a little different from the one I made before.  

This print is Fanfare by Rae Hoekstra.  Tiny foxes and elephants in gray, aqua and butterscotch.  Some of my favorite colors. 


Can you tell I like elephants?  I like animals of all kinds.
These are the cutest elephants paired up with some coordinating colors of flannel from my stash.

 I found this crab print flannel at my LQS (local quilt shop.)


Since I am a beach person and a cancer the crab zodiac sign, I like little crabs and had to have this little crab and the word "crabby" printed below it. I paired it with sand colored flannels with some dots that remind me of bubbles.  It is really cute. And the borders seem to add a little extra to the whole look. Don't be afraid to piece two different fabrics in the middle of the block.  It adds more fluffy edges to the mix. 
This is the back side.  All the fluffy edges are on the other side.
I could not pass on this tractor print.  It's pretty cute! It is one of my favorites.  If you have three tractor loving grandboys like I do, you cannot pass up tractor fabric.  The brown and gray prints have circles which look like wheels and I paired some primary colored flannels to match the colors of the tractors.  In this quilt, I put 100% cotton batting in between the two layers of flannel.  I stitched across twice to quilt each block. Usually the two layers of flannel are plenty but that extra layer does add some additional softness and extra warmth.  There is no back or front on this quilt because both sides have fluffy edges. I sewed every other edge seam to go either to the front or back on this one. 
And one last tractor raggedy edge flannel quilt.  This is made with 8.5 square blocks.  All ragged edges are on the front.  This one has not been washed yet.  

 Back side.  So cute in the primary colors.

 All rag quilts have to be washed a few times to fray the edges. Shake before you dry.  Before you load the wash into the dryer, take your freshly washed load outside and give everything a good shake.  You cannot imagine how many little thread clippings will shake out.  Put your load in the dryer and stay close to your dryer while they are tumbling dry. I have to empty the lint catcher many times to collect the lint.  And there will be a lot the first time you wash but after another washing or two there will be an end to all of that.

I do plan to list these in my Esty store just in case you just need to have one.  Thanks for stopping by.   

Wednesday, November 19, 2014

Fair Isle Quilt Reindeer


This is really a fun pattern and is proving to be a fun one to make. However, these reindeer are pretty labor intensive.  The designer wanted a pixelated look and I really got mixed up on the lines and there was a whole lotta ripping out stitches yesterday.  I plan to make a smaller version of this quilt but I may end up having to make two more reindeer to make it symmetrical.


 This is the color scheme of my Fair Isle Quilt.  There are some really fantastic color combinations being created if you would want to check out #FairIsleQuilt on Instagram.  
 Pardon my shelving next to my design "wall".  It is a large piece of flannel I am using to pin my blocks on. 
I really really like it.  I am linking my reindeer with the others and looking forward to the next step to be featured tomorrow on FreshlyPieced's blog. 

Thank you for stopping by and have a great day! 

Monday, November 10, 2014

Fair Isle Sew Along

I am a little bit late to the party but I am glad to have started the Fair Isle Quilt Sew Along.  Freshly Pieced has put together a sew along that is designed to have your quilt finished by December 25. Maybe it was the lime green fir trees or maybe the pink poinsettias that got me.  I could not stop thinking about "jumpers" worn by Bridget Jones and Marc Darcy.  Anyway, I bought the pattern here and I am in.  This is my very first sew along and I am quite excited.  I think I have picked a great quilt to make for my first sew along. It is going to be fun and I have most of the Kona solids in my stash.


 It helps me to set up all the pieces on cardboard (USPS Priority Mail boxes).  I have had a fair amount of stitch removal by not paying close attention to the way the flower petals turn and the green check corners.  The pattern is not difficult at all.  Easy enough for a beginner.  Trimming the half square triangles makes for easy accurate piecing. 

 I have decided on this fabric for the backing.     


Linking up to Freshly Pieced.

Thanks for stopping by.

Thursday, November 6, 2014

Modern Christmas


Yes, Yes! I have started (and almost finished) another quilt.  No, no I haven't finished all the others, but I will. I am calling this newest quilt Modern Christmas. It is modern looking, but in truth it is an old traditional pattern called the Drunkard's Path.  I absolutely love the fabric because it is Christmas in theme but not typical. Right now I think I am going through a kind of quilting rebellion.  I have been moving pretty far away from my usual color choices and patterns.  Bring it on! Of course that means I am branching out, trying new things, starting new techniques, buying more fabric, and just loving all the new style quilts I am producing these days.  
And I am even piecing the backs!  I bought one yard of the Gray Leaf and Red Holly Berry fabric.  I bought one and a half yards of the pine cone, tree, snowflake, music score fabric.  If I was given only one thought to describe what I love most about this holiday season, aside from celebrating the birth of our dear Savior, it would be the sight and smell of snow and pine trees and hearing choirs singing Christmas music.  Well that's two; and adding three, is family together. 


You can stop here or read on for my sewing this quilt story.    

At the Quilt Show last week I purchased the Curve Master presser foot. 
 And on Sunday afternoon I played around with this foot and with this fabric.  
And oh my, I have a lot to learn when it come to cutting out the Drunkard's Path shapes and stitching them with that foot.  But really these pictures exaggerate how bad I did.  I got the hang of it pretty fast.  While sewing I used the internet to hone my skills and found this tutorial and was totally liberated and confident with my new skills.   Gone Aussie Quilting has this FANTASTIC tutorial and look at how she made those clamshells out of the Drunkard's Path.  Now there is another quilt on my list to make.  She said if the ends don't match, cut the block down a size!  Who care's???  My thought exactly.  And from then on I made those patches and cut them all down because maybe only one or two matched on both ends.  And that resulted in all those pretty patches.


And now that I have my Juki sewing machine, it comes with a foot that can basically be used the same way as the Curve Master foot. I made the remaining blocks with the Juki foot and the results are comparable.  
     
 I have been researching machine quilting snowflakes.  I want to quilt snowflakes in each circle. 

I hope you like my quilt....there are literally dozens of ways to twist and turn these patches into all kinds of settings to produce dozens of quilts.  I played around with many of them and decided I was just happy with the circles.  Plus that yard of fabric only went so far and I was not going to buy more.  And also I wanted to keep the quilt smallish and be able to finish it in a day or two because I have gone and bought some more fabric to start ANOTHER quilt! Yippee!
  

Here I go all modern! 

I am linking to Works in Progress Wednesday over at Esther's blog 
and over at Quilt Story Fabric Tuesday and over at Vicki Welsh's Drunkard Path Quilt Along . It is her quilt along that inspired me to give the Drunkard Path a try.  
Linking up to Live a Colorful Life  

 Thanks for stopping by!

Monday, November 3, 2014

Quilt Festival 2014


I was there too!  This past Thursday at The Houston International Quilt Festival, I was there!  For more than 20 years I have been going to the Quilt Show in Houston.   It is a really big deal for the City of Houston. I would say probably 70% of the public has no idea that such a huge event is held in our city for two weeks every year. Quilting is big business.  It's not your grandma's quilt any more.  Major fabric companies, vendors and just regular quilty people come to visit from all over the world.  I just love it.  Polly who blogs from Aunt Polly's Porch, said "It is exhilarating to be surrounded by others who love and understand your "bliss"!! I agree.
      

It was crowded on that first day open to the public. There is a quilt display side and a vendor side to the convention hall.  I have to admit, I am a vendor person.  I have to see the latest and newest fabrics and gadgets.  I am a consumer.  I plunk down some plastic every time I go.  My car is out on the corner so I can drive by at the end of the day and load up that roll of batting or that new Juki 2010. What? You read  that right.  I usually go two days, one for the vendors and one for the quilts displayed.  I only made one day this year.    I wish there is a video of the quilts. I would love to see it.

Moving on....while strolling the aisles, 


Everyone is on the lookout for the celebrities.  Here is Edyta of Laundry Basket Quilts hard at work signing her new book. .


Here is the wonderful and oh so charming, Jenny, from the Missouri Star Quilt Company.  Every day I check their daily deals.  Her tutorials have made me enjoy the lighter side of quilt making....just stitching up a quilt for the fun of it. 
   
 And here is the grand Eleanor Burns....I have seen her working hard at every show I can remember.  I am sewing on an autographed by Eleanor Burns Elna sewing machine that I purchased at a quilt show long long ago.   

 What wonderful and savvy business ladies!  


I was hoping I would see the ADORNit booth.  Yep, they are back.  I LOVE their fabrics. They started out with scrapbook accessories and joined the fabric world.  I have this beautiful work in progress that I am making from their line.  

They haven't gotten nearly enough notice, but I know they are headed for the top of the game. Their fabrics are so cute. I picked up some more for a cowboy quilt and some of their winter snowmen and little fox prints.


  Moda was passing out free Sweet Treats.  Thank you, Moda 

 I picked up this packet of 12 fat quarters of blues and beige from Hearts to Holly . They blend well with the cowboy colors. I really like how they package and market their product. 

I also picked up one of bonnieandcamille's Miss Kate.... 


because I have one of them too! Hey baby Kate!


I got one of these Curve Master pressure feet for piecing curves.  I haven't quite mastered it yet.  


T


Yep, I got me a Juki.  I went to the quilt show this year to buy a new machine.  I have done some research on sewing machines since my Viking is ready for retirement.  So far I am loving it.  


Some Low Volume fabrics.  I am always looking for them.  I got some cuties.

I had a wonderful day! 

Thank you Karey Bresenham for your Quilt Festival vision 40 years ago.  I have one of your shopping bags from your store, Great Expectations, hanging on the wall in my sewing room.  Maybe a collectors item??


 I have enjoyed every minute at every festival I have attended.  One of my bucket list items is to stay at a downtown hotel, take classes during the week of Quilt Market and just soak it all in.  I am always in such a rush to see it all and head for home before the evening traffic. .  

Thank you for stopping by!     

Tuesday, October 28, 2014

Hemispheres - A Baby Quilt Finish

The baby quilt has been gifted officially. I can now post photos of the finished baby quilt I recently made for our newest grandson soon to be. The pattern is called Hemispheres.


 I found this quilt pattern via internet search on this blog, City Stitches.   It is a pattern by Megan Nicols of City Stitches and offered by Aria Lane and available for purchase at Pile of Fabric and at Mad About Patchwork.  I read through all of Megan's quilt along posts and decided I was up for a new challenge: Circles.   

I was searching for something unique.  Non-traditional.  Bold primary colors.  My daughter said this was the quilt for her.  The bright colors and the bold shapes completed the vision she had for her nursery.  My daughter grew up in the Northern Hemisphere and my son in law grew up in the Southern Hemisphere.  The quilt already has special meaning to their family history. 


Attention:  You can stop now if you don't want to continue reading my sewing story.  
I know my posts get a little lengthy with pictures and story.

Keep reading to see how I made this Hemispheres Quilt.

I love this part of quilt making.  
The vision, the shopping, the research and all the preparation before the first cut.  

  • I had a limited selection of solid colored fabrics.  So I had to grow my collection fast. 
  • I loaded up a shopping cart and headed to the cutting counter.   
  • I purchased a nice colorful rainbow stack of 1/4 yard cuts of Kona cottons.


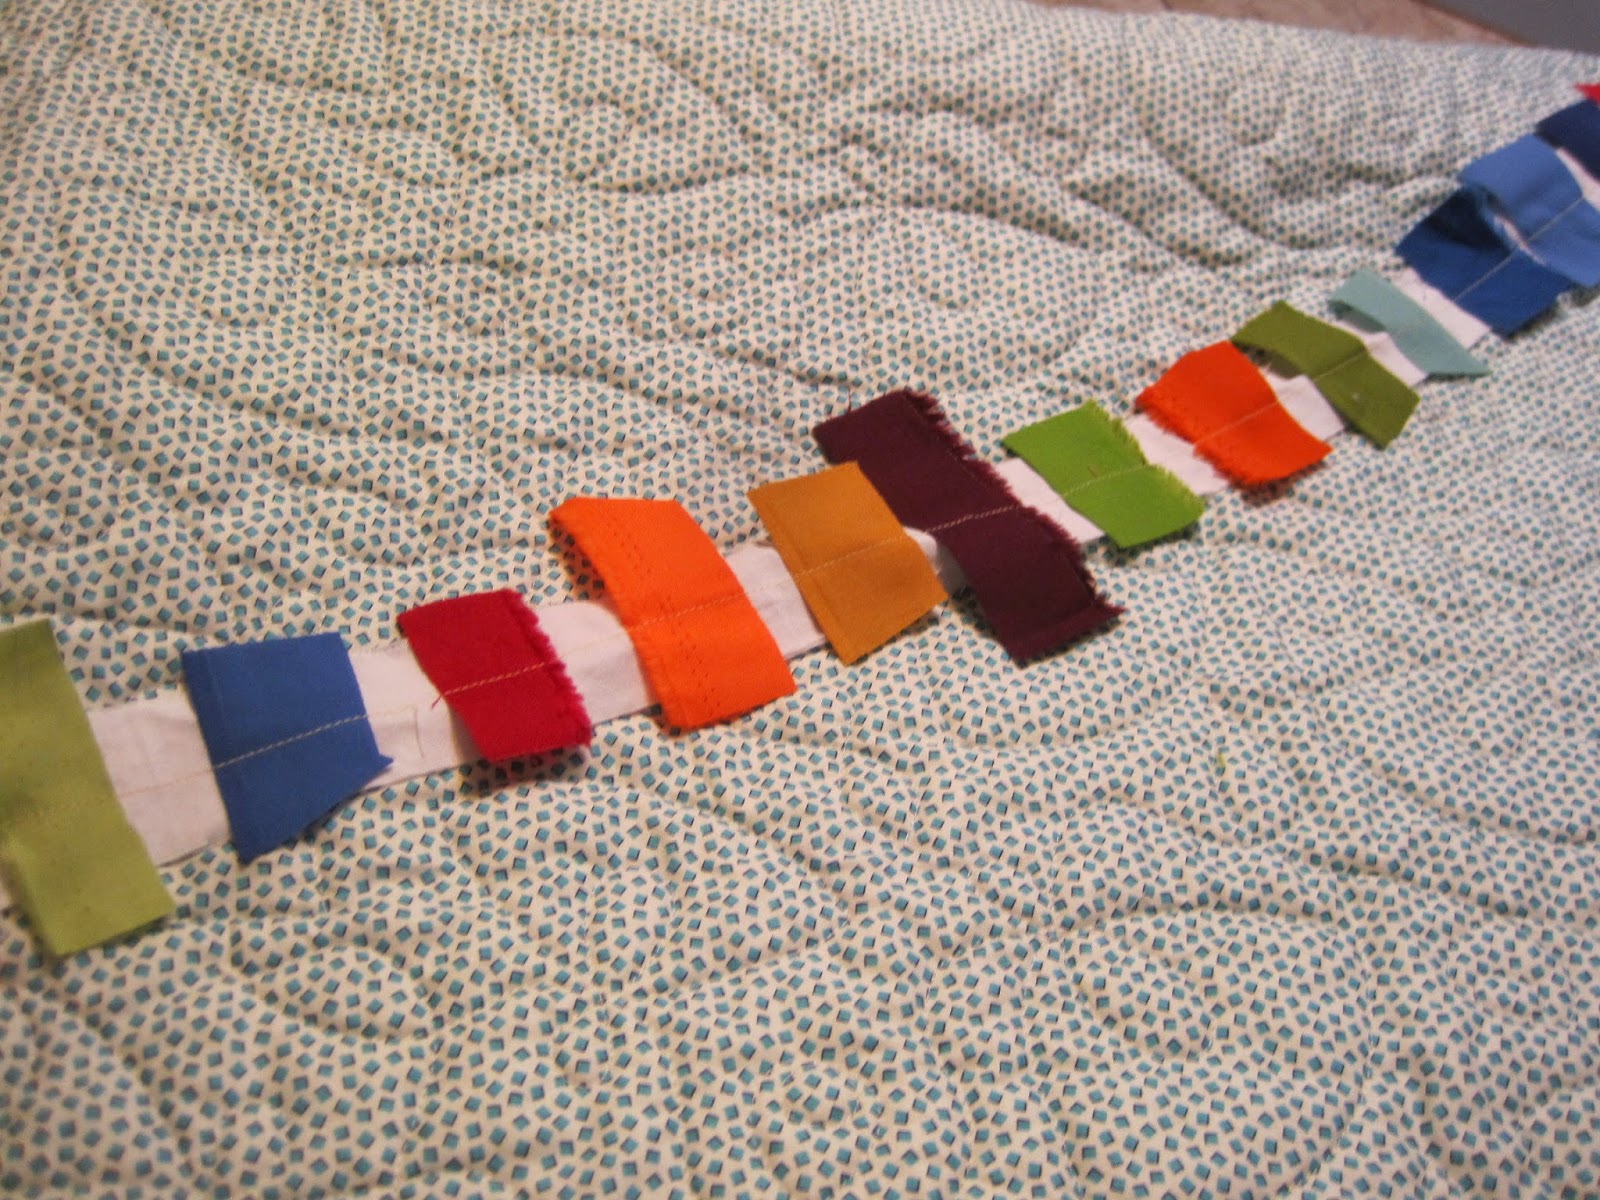
I did prewash all of these fabrics.  I have had a bad experience with color bleeding on deep maroon, red and dark navy blue.  I just thought it best for a quilt that would be washed often.  I cut a snippet of each color and sewed it on a strip of Kona White.  There was some suspect color bleeding so those were eliminated from the "rainbow".


***I have a confession to make. I did not follow the pattern maker's directions.***

I cut out my half circles using the 7 inch marking on the ruler and sewed right sides together to fusible webbing. Then I turned the half circles right side out, cut close to the seam allowance, and ironed the half circle on to the white background fabric.


Disclaimer:  These photos may not be in the proper sequence.  Nor do I have pictures of every step in the process. You get the idea, right?


Then I topstitched the half circle to the background.  It wasn't that I couldn't have taken the time to cut the circle pies and the background crusts....Ain't nobody got time for that!  I took the shortcut I learned from Eleanor Burns and went with it.  There is extra bulk but not enough to matter...to me anyway!


SPIRAL QUILTING!
My first attempt.  

I did research this technique extensively.  Crazy Mom Quilts has a great tutorial. So does VeryKerryBerry. I used both of these tutorials.  There are many generous quilters who have taken the time to share their talents so please check them out.

I layered quilt top, batting (Soft and White by The Warm Company) and backing...and pinned every three inches as instructed.  I didn't use a walking foot as recommended.  Mainly because the quilt guide I needed would not fit on my walking foot.  I needed the quilt guide to mark the spacing between lines of stitching.


Round and round I went.  It is really not that bad.  Honest!


I did tie and knot all the threads. Then I hid all of the thread tails pulling them with the threaded needle into the layers.  Very time consuming but it must be done.  Don't want to risk threads unraveling with the washing and drying in years to come.


I did encounter a few bumps along the way.  There were some pleats and puckers. The entire backing shifted with the spiral sewing.  I was left with some triangle edges showing.  So I sewed some extra backing fabric over the spaces and no one but me will ever know about that.


My sewing stitches are not always smooth. Always make sure the needle is down before lifting your pressure foot.  The stopping and starting will make little jags like this:


And I still haven't mastered pin basting, no matter how many pins I put in.  Watch out for shifting,especially while spiral quilting like this: 


 The fabric I chose for the back of the quilt.


Will I ever make another circular quilt?  Will I ever spiral quilt again?
Yeah Buddy!  I have a few projects whirling around in my head for sure!

The quilt is wonderful.  We all love how it turned out.  


It is finished off with a matching multi-colored stripe binding. The backing is blue with multi-colored dots.
None of my blips stand out.  Isn't it great?

Thanks for stopping by for today's quilt story.